Easy Halloween Crafts for Kids.
With Halloween being right around the corner, I want to share some super simple crafts to help get into the spirit.
I’m all about simplicity when it comes to art with my kids. I enjoy crafting but I want to be able to minimize the stress and clean up.
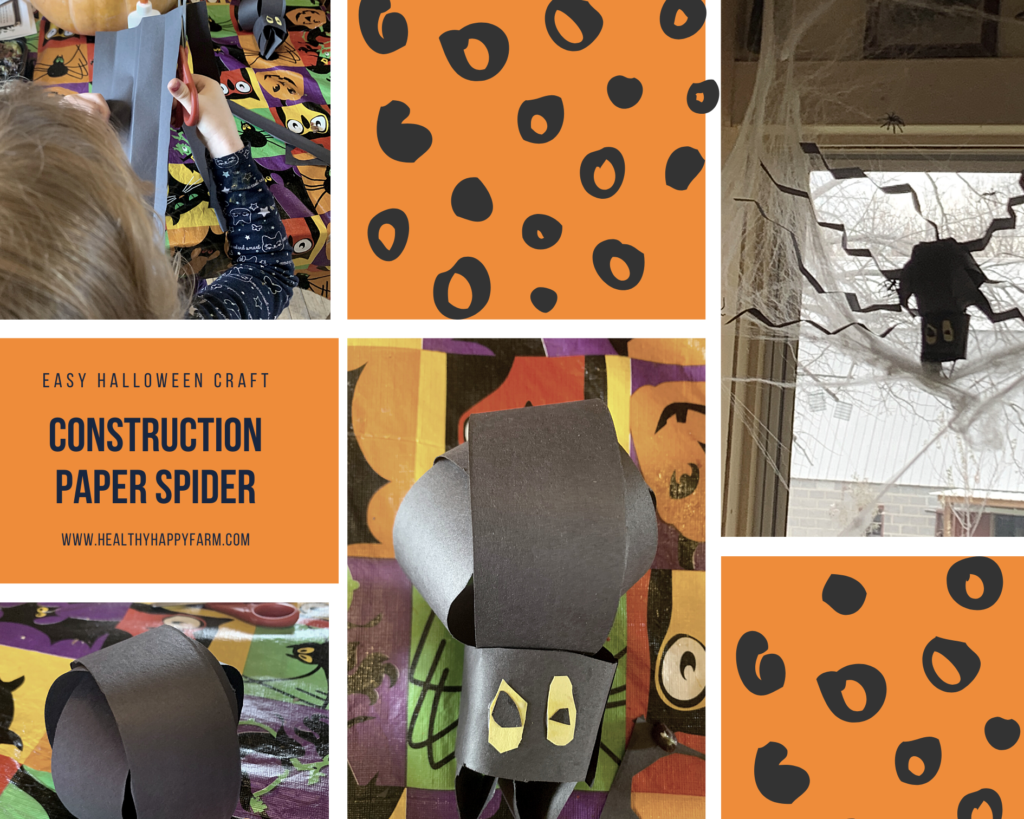
This construction paper spider was done by my 5 year old in less than 2 hrs.

Simply cut 1-2 inch wide strips of black paper. Making a ring, glue or staple the ends of a strip together. Repeat the step but make your rings on top of and across the previous ring to form a ball. Now you have your spiders body.
For the head, you can make another smaller ball or if you want fangs make a ring like above and bend a side in to create 2 pointy edges. Then, wrap one more piece of paper on top like the picture below and make some eyes. Google eyes work well too.
For the legs, we cut 8 strips of black paper and folded them back and forth to create a crimp style legs. Glue or staple them on and your spider is ready!
You can easily make a pumpkin by creating a ball with orange strips of paper like the spider above or attach wings to your black ball for a bat.
Ghost and Pumpkin Sun catcher
Materials
- 1 piece White Tissue paper If your making the ghost
- 1 piece Orange tissue paper If your making the pumpkin
- 1 piece construction paper (preferably black) one piece per artwork
Instructions
- First, Draw the shape of the ghost and/or Pumpkin on the Construction paper. * Save the scraps
- Next, Cut the ghost or pumpkin out. * you could let your little one help if they are practicing scissors skills
- Than, give the little artist a piece of tissue paper and glue stick. Guide them as needed on where to put the glue, It should be applied to the edge of the cutout on the construction paper.
- Meanwhile, Cut out eyes and a mouth from the scrap construction paper and let your crafter attach the pieces to the tissue with the glue stick.
- Ta Da! let it dry and tape it to the window
Illuminated Mummy Jars
Materials
- 1 Canning jar
- 1 yard Toilet Paper
- 2 Google eyes
- Elmer's glue
- 1 non burning candle or little light
Instructions
- First, With your Little one, fold or roll toilet paper into fourths lengthwise.
- Next, Apply glue to the outside of the canning jar in dots or in a zig zag pattern.
- Than, starting from the bottom attach the toilet paper to the jar. Like you would see on a mummy.
- Finally, glue on some google eyes and put your non burning candle. Isn't that pretty?
Notes
And you really can’t go wrong will a classic build your own pumpkin craft.
Build your own Pumpkin
Materials
- 1 piece Orange construction paper
- 1 piece Black construction paper
- 1 stick glue
- 1 scissor
Instructions
- First, All you have to do is Pre-cut a pumpkin (any shape or color you want), then cut out some fun shapes such as triangles. If you have lots of sizes and shapes they can get creative. *If you want to work on scissor skills you could draw out the lines for the pumpkin and let your little one cut the line.
- Next, when your ready for crafting, give your artist a pre-cut pumpkin, shapes, and glue stick.
- Finally, they can make their very own pumpkin anyway they want in little time and little mess!
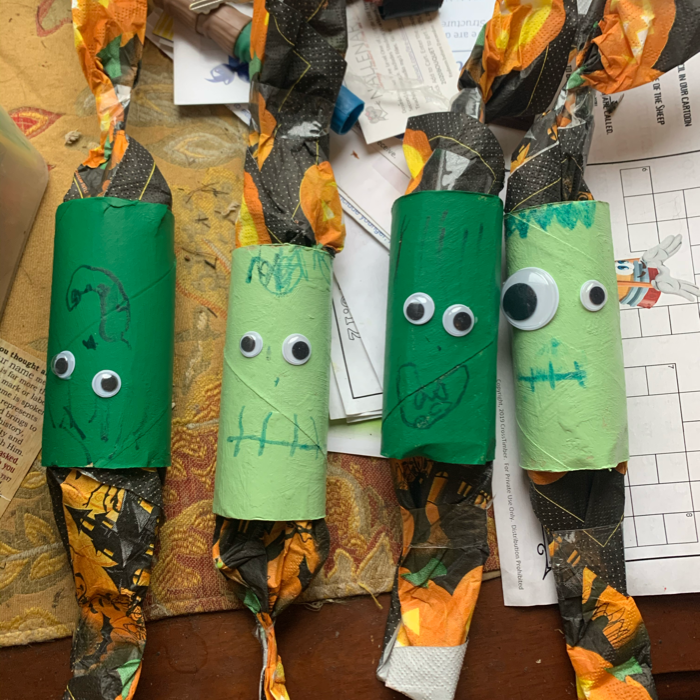
This is a fun way to give treats, presents, and prizes.

Decorate an empty toilet paper roll into your favorite monster, pumpkin, ghost, or any creative way you want. I like to let the kids paint them but cutting and pasting construction paper on top looks great too. We painted Frankensteins on ours!
Next, take a napkin or tissue paper and roll up the special prize (remember it has to fit back in the tube so you have about an inch diameter). Then, close the ends. We taped both ends but tying the ends with ribbon would look pretty sweet.
Lastly, carefully slide the gift into the decorated tube.
Now that is a fun way to give gifts!
I wish you all a wonderful and safe Halloween!


